Initial Problem
My parents are avid sailors and love to go sailing every weekend in the summer. However, in the Summer of 2023, their cupholder broke-annoying! I suspect that the cause was someone leaning on the cupholder, as it is located in the middle of where the seats are on the boat. That summer, I quickly made them a new one, using Lexan from Home Depot and doing my best with pencil and ruler to replicate the broken part, which can be seen below.
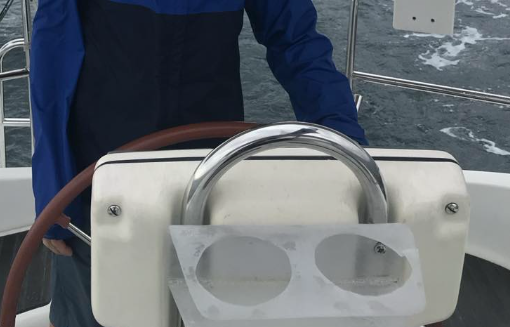
Unfortunately, my replacement part suffered the same as the original, cracking in the same place. This caused me to decide to build them something robust, that could withstand the boating environment but also provide more utility than the two weirdly large holes of the old cupholder.
Design Goals
With that, my design goals started to fall into place:
DG1: Does not break
This was the most obvious: solve the biggest problem with the last two parts, the breaking issue
DG2: Provides more functionality than previous cupholders
Previous cupholders had only two places for beverages, and holes were too large for most cans or bottles, causing them to slide around. For the new version, I wanted at least room for 3 bottles/cans, as well as room for at least one phone.
Structural Design
The first structural idea that I explored was keeping the bent shape of the original cupholder, so as to better fit in with the general boat aesthetics. I also liked how using a single bent piece could keep the part count down, so I decided to go with this as my structure. To rigidify the structure, I decided to put standoffs in between the two bent metal flanges, to prevent these sides from bowing and make the structure stronger, allowing me to use thinner material.
Material Choice
Based on the last two parts being plastic, my first thought was to use metal for the design. Of course, some designs in plastic could probably be made to work, but I wasn’t confident that I could do it without increasing thickness too much. Increasing the thickness would be bad because I preferred the bent sheet metal design, and it becomes harder to correctly bend plastic at say, 5/16 or 3/8” thickness.
Once I could justify using metal, the choice came down to 2 materials: Aluminum and Stainless Steel, as these are the more corrosion-resistant commonly used metals. However, upon further research, Aluminum corrodes when exposed to saltwater, so I decided on Stainless Steel for the frame.
Having decided on a metal frame, my instinct told me another material should be used in combination with the metal to get some of the advantages of plastic without having to use it. For example, plastic won’t get hot in the sun and is less likely to make harsh sounds when in contact with a glass bottle or metal can.
After researching the topic, I decided to use Cork to surround the metal on a few of its faces. I made this choice because Cork is commonly used in shipbuilding due its waterproof and stain-resistant nature.
MFG Methods
With my materials and basic structure decided, I thought about manufacturing methods. I found a supplier, SendCutSend, that could do a SS piece in my size for a very good price. I considered paying for bending to be done by them, but eventually decided I would do the bending myself, using a propane torch to heat the metal to make it more pliable. For the cork, I could use a laser cutter to cut this out quickly and easily.
Design Evolution:
After creating the initial shape, I experimented with many different ways to arrange different numbers of drinks and phones. At first, I imagined having two main beverage locations, with a cam mechanism in the middle that could set the openings on either side of it to be smaller or larger.
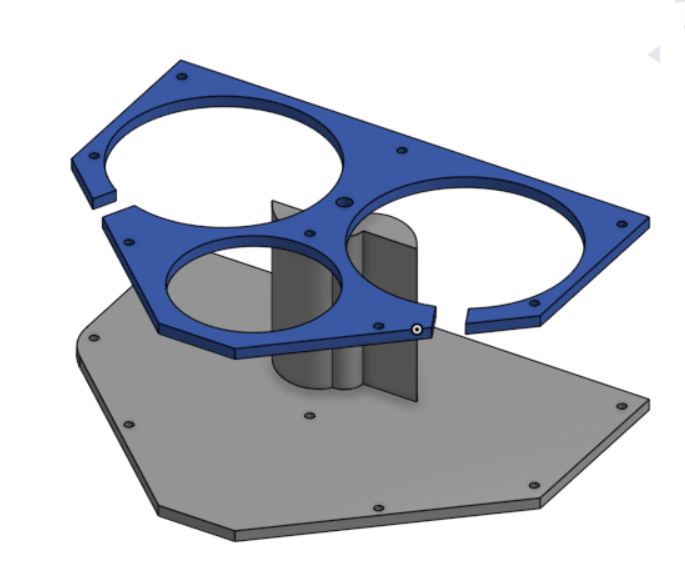
However, upon talking to the users, they reported almost all of their drinks were from glass bottles or cans, which are both around the same size, so I abandoned the adjustable idea.
Another thing I wanted to include was a way for the cupholder to hold wine glasses in addition to normal cans and bottles. This was challenging due to the large differences in size between wine glasses and cans.
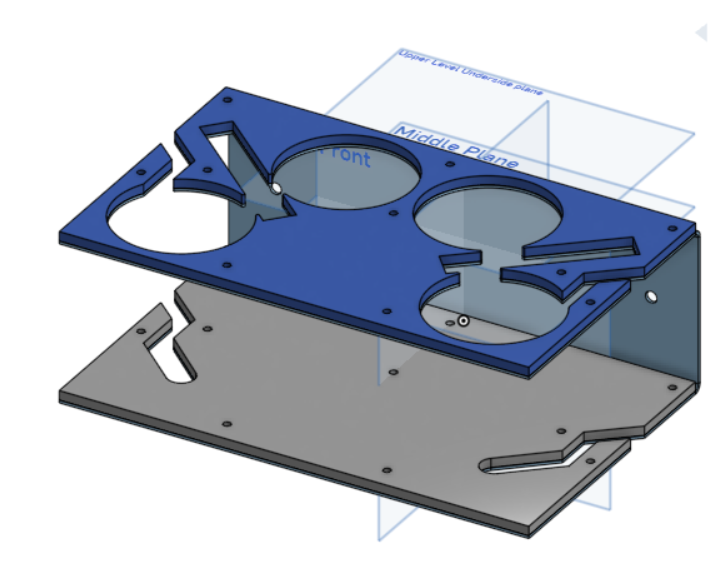
As you can see, the two beverage locations on the outside front were meant for wine glasses.
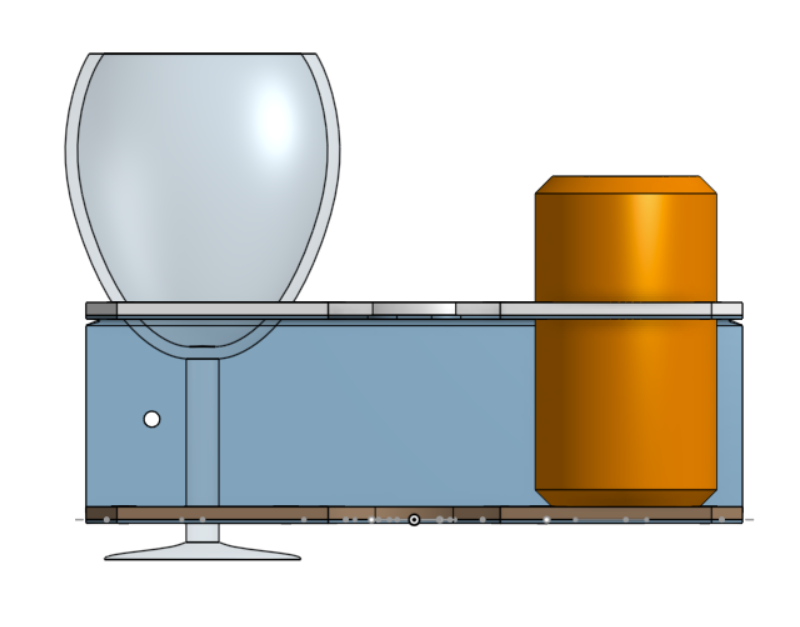
In the next version, I refined the concept of how to use the same size hole for wine glasses and normal beverages. By giving room for the stem on the bottom plate, the glass is allowed to rest on the rim of the beverage hole, while the base hangs below.
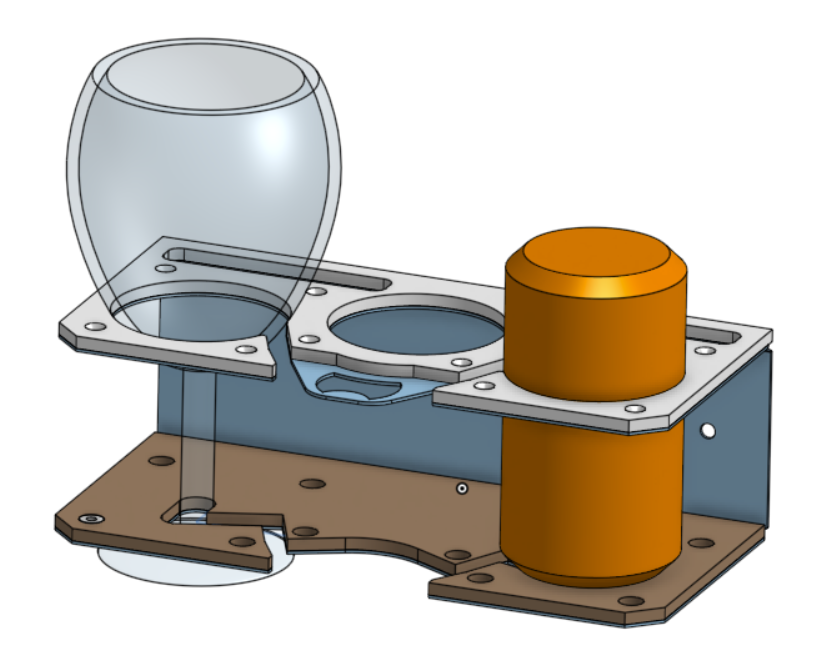
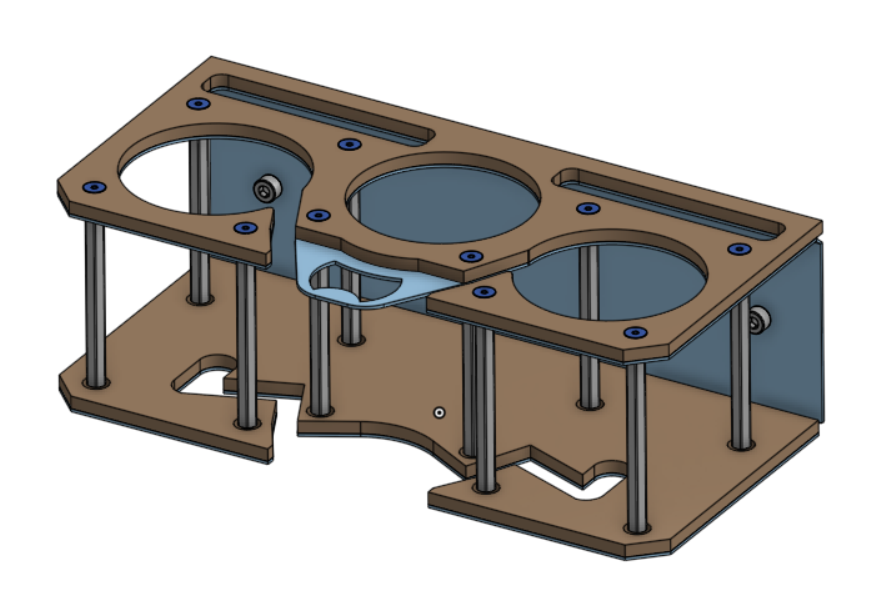
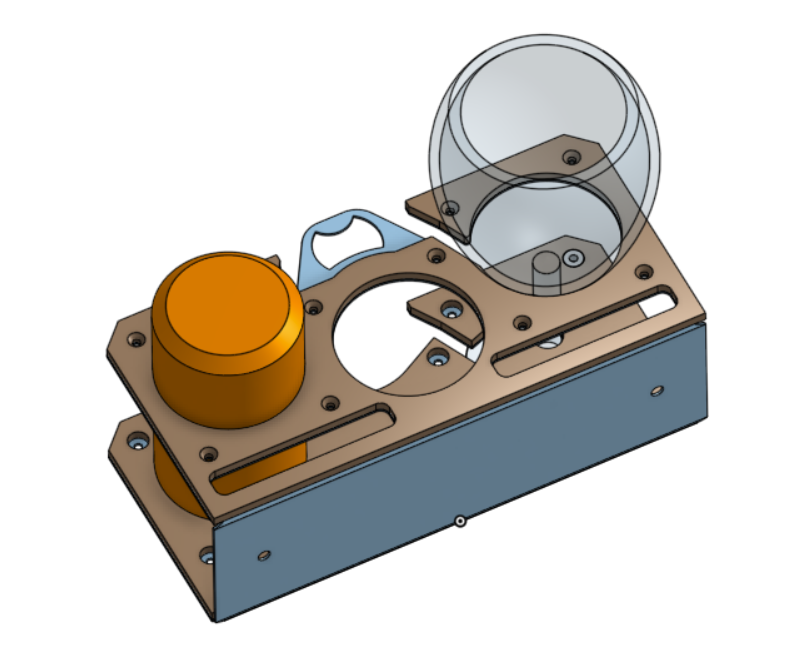
Finally, I came to an arrangement that had a little bit of everything: 3 beverage locations, 2 of which could fit a wine glass, 2 phone holders, and even a bottle opener
Small details
Once the layout was finalized, I worked on some smaller details.
First, I checked tables online to make sure that my bend radius and necessary feature distance from the bend were accurate. Then, to help me make the bends properly, I cut notches into the structure where the bends are, to give me a place to mark off the bending line and to encourage the material to bend at the correct place.
I also considered the space underneath the bottle opener, cutting away some excess material to ensure the bottle wouldn’t interfere with anything while being opened.
Problem Found, Problem Solved
Upon assembling the cupholder, I discovered an issue with the design that I had missed. The standoffs were bolted through a layer of cork, making them less stable and more prone to being at weird angles. To solve this, I cut out small plastic spacers the same height as the cork and placed one under each standoff. I then re-cut the cork with room for these spacers.
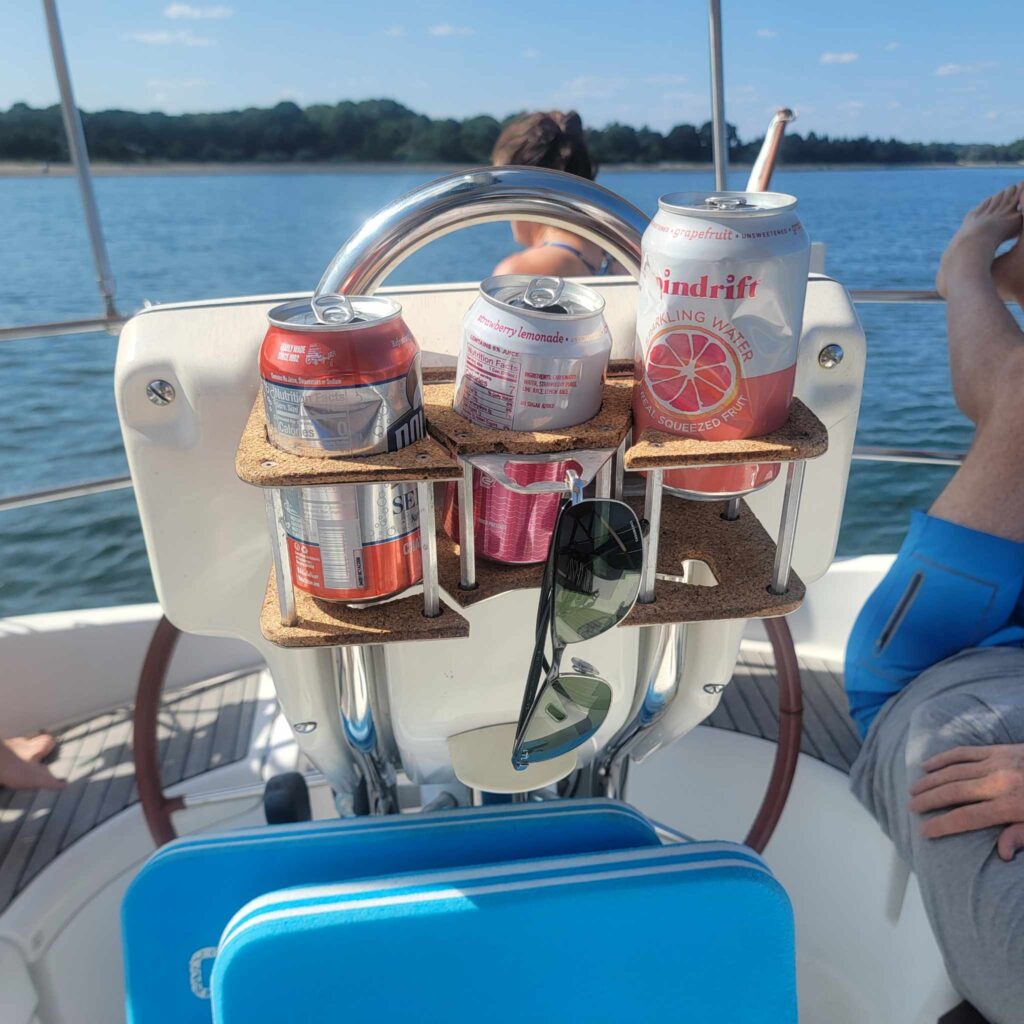
Final Product